Building Custom Optimizely Opal Tools: A Complete Guide
💡A Note About the Opal SDK
We're thrilled about what Optimizely is building with Opal! The ability to extend an AI platform with custom tools opens incredible possibilities, and we're excited to be exploring this frontier alongside Optimizely as they actively develop these capabilities.
For this guide, we chose to build directly against Opal's HTTP protocol rather than using the SDK. Why? Our clients need production-ready custom tools now, and with the SDK and documentation currently in beta, evolving rapidly with frequent updates, we felt the stable HTTP protocol provided a more reliable foundation for business-critical integrations. This approach has taught us valuable lessons about how Opal works under the hood, insights we're sharing with our team, our clients, and the broader community.
This is a temporary approach driven by excitement and urgency. Once the SDK stabilizes and documentation matures, we'll enthusiastically pivot to SDK-based development and update this guide accordingly. Until then, we're learning, building, and contributing to the ecosystem as it grows. If you're as eager as we are to build with Opal and can't wait for the SDK to stabilize, this guide will help you do it responsibly and effectively.

Introduction
Optimizely Opal is revolutionizing how teams interact with digital experience platforms through AI-powered agents. While Opal includes powerful built-in capabilities, the real magic happens when you extend it with custom tools tailored to your organization's specific needs and expertise.
This guide walks you through building a production-ready custom Opal tool without using the official SDK - giving you complete control over implementation, hosting, and integration with your existing systems.
Why Build Custom Tools?
Embed Domain Expertise: Package your organization's knowledge into reusable AI capabilities
Automate Complex Workflows: Turn multi-step processes into single conversational requests
Integrate Legacy Systems: Bridge Opal with proprietary databases, APIs, and tools
Competitive Advantage: Deliver unique capabilities competitors can't easily replicate
What Makes This Guide Different?
This isn't theoretical documentation - it's battle-tested wisdom from building one of the first custom Opal tools in production. We'll share:
✅ What actually works (not just what should work in theory)
⚠️ Common pitfalls (and how to avoid them)
🔧 Real debugging techniques (when things inevitably break)
🎯 Production-ready patterns (not just POC code)
What You'll Learn
By the end of this guide, you'll be able to:
Design effective Opal tools that solve real business problems
Build FastAPI-based tool services with proper validation and error handling
Create discovery endpoints that match Opal's exact specifications
Handle Opal's request format (which differs from standard REST patterns)
Deploy to cloud platforms with continuous deployment
Register and sync tools in Opal's tool registry
Create specialized agents that leverage your custom tools
Debug integration issues using logs and systematic testing
Follow best practices for production tools
Prerequisites
Required Knowledge
Python Basics: Understanding of functions, classes, and async/await
REST APIs: Familiarity with HTTP methods, status codes, JSON
Command Line: Comfortable with terminal commands
Git/GitHub: Version control fundamentals
Required Access
Optimizely Account: With Opal enabled and admin permissions
Cloud Hosting: We'll use Railway (free tier works), but any platform works
Development Tools:
Python 3.8+
Code editor (VS Code, Cursor, etc.)
Terminal/command line
Git
Recommended (Not Required)
FastAPI experience (we'll teach the essentials)
Cloud deployment experience
Understanding of AI/LLM concepts
Understanding Opal's Architecture
Before diving into code, let's understand how Opal discovers and executes custom tools.
The Big Picture
User Chat → Opal Agent → Tool Registry → Your Custom Tool → Analysis → Response
Key Concepts
1. Tool Discovery
Opal doesn't search the internet for tools - you explicitly tell it where to find yours by registering a discovery endpoint. Think of it like adding a new phone number to your contacts list.
Discovery Endpoint: A public URL that returns JSON describing what your tool does
Example:
https://your-tool.com/discoveryCalled when: You register the tool or click "Sync" in Opal
Returns: Tool manifest (name, description, parameters, etc.)
2. Tool Execution
Once Opal knows about your tool, it can call it when relevant. The agent analyzes user intent, gathers necessary parameters, then makes an HTTP POST request to your execution endpoint.
Execution Endpoint: The URL that actually performs your tool's function
Example:
https://your-tool.com/analyzeCalled when: An agent decides to use your tool
Receives: JSON with parameters wrapped in a specific format
Returns: Your tool's results (any JSON structure)
3. The Tool Manifest
The manifest is like a contract between your tool and Opal. It specifies:
{
  "functions": [
    {
      "name": "my_awesome_tool",
      "description": "What it does and when to use it",
      "parameters": [
        {
          "name": "input_parameter",
          "type": "string",
          "description": "What this parameter means",
          "required": true
        }
      ],
      "endpoint": "/execute",
      "http_method": "POST",
      "auth_requirements": []
    }
  ]
}
Critical Detail: The format matters. Opal is strict about the structure - we'll cover the exact format later.
4. Specialized Agents
Agents are AI assistants configured with:
Instructions: How to behave and communicate
Tools: Which custom tools they can use
Context: Domain expertise and response formatting
You create agents in Opal's UI, link your custom tools, and configure how they interact with users.
Step 1: Planning Your Tool
Choose the Right Problem
The best custom tools solve problems that:
✅ Require specialized logic that LLMs can't handle alone
Complex calculations (statistics, pricing, forecasting)
Multi-step validations with specific business rules
Access to proprietary data or systems
✅ Benefit from automation
Eliminate manual expert review steps
Reduce time from hours to seconds
Ensure consistency across teams
✅ Have clear inputs and outputs
Well-defined parameters
Deterministic results
Actionable recommendations
❌ Avoid these anti-patterns:
Things LLMs already do well (writing, summarizing)
Problems requiring human judgment
Tools that just wrap API calls (Opal can do that directly)
Our Example: A/B Test Readiness Analyzer
Problem: Teams launch poorly-designed experiments, wasting time and resources.
Solution: A tool that:
Analyzes test proposals for statistical validity
Scores hypothesis quality using pattern matching
Validates test design against best practices
Provides specific, actionable recommendations
Why This Works:
Requires complex statistical calculations (Cohen's d, power analysis)
Needs domain expertise (experimentation best practices)
Has clear inputs (hypothesis, traffic, conversion rate)
Produces actionable output (readiness status, recommendations)
Define Your Tool's Interface
Before writing code, document:
Tool Name: test_readiness_analyzer
Description: Analyzes A/B test proposals for statistical validity, hypothesis quality, and design best practices. Use this when a user wants to evaluate if their experiment is ready to launch.
Input Parameters:
- hypothesis (string, required): Test hypothesis with expected outcome

- baseline_conversion_rate (number, required): Current rate (0-1)

- minimum_detectable_effect (number, required): Minimum lift to detect (0-1)

- daily_traffic (integer, required): Daily visitor volume

- number_of_variations (integer, optional): Count including control

- primary_metric (string, required): Main success metric

- secondary_metrics (array, optional): Additional tracking metrics

- test_start_date (string, optional): Planned launch date
Output Structure:
{
  "readiness_status": "READY | NEEDS_WORK | NOT_READY",
  "statistical_analysis": { sample_size, duration, warnings },
  "hypothesis_analysis": { score, feedback, improvements },
  "design_analysis": { warnings, recommendations },
  "overall_recommendations": [ actionable items ]
}
Sketch the User Flow
1. User: "I want to test a new checkout button" 2. Agent: "Great! Tell me about your test..." [asks for parameters] 3. User: Provides test details 4. Agent: [Calls test_readiness_analyzer tool] 5. Tool: [Analyzes and returns results] 6. Agent: "Your test is READY! Here's why..." [formats results] 7. User: Sees analysis with recommendations
Step 2: Setting Up Your Development Environment
Create Project Structure
# Create project directory
mkdir my-opal-tool
cd my-opal-tool

# Initialize Git
git init

# Create Python virtual environment
python3 -m venv venv
source venv/bin/activate  # On Windows: venv\Scripts\activate

# Create project files
touch app.py
touch requirements.txt
touch .gitignore
touch README.md
Install Dependencies
requirements.txt:
fastapi==0.104.1
uvicorn[standard]==0.24.0
pydantic==2.5.0
# Add any domain-specific libraries
# scipy==1.11.4  # For statistical calculations
# pandas==2.1.3  # For data manipulation
Install:
pip install -r requirements.txtConfigure .gitignore
.gitignore:
venv/
__pycache__/
*.pyc
.env
.DS_Store
*.log
Initialize Git Repository
git add .
git commit -m "Initial project setup"
Step 3: Building the Tool API
Basic FastAPI Application
app.py (starter template):
from fastapi import FastAPI, HTTPException, Request
from pydantic import BaseModel, Field
from typing import Optional, List, Dict, Any
import logging

# Configure logging
logging.basicConfig(level=logging.INFO)
logger = logging.getLogger(__name__)

# Initialize FastAPI
app = FastAPI(
    title="My Opal Tool",
    description="Custom tool for Optimizely Opal",
    version="1.0.0"
)

# Health check endpoint (required for deployment platforms)
@app.get("/health")
async def health_check():
    """Health check endpoint for monitoring"""
    return {"status": "healthy", "version": "1.0.0"}

# We'll add discovery and execution endpoints next
Define Your Data Models
Use Pydantic for automatic validation:
from enum import Enum

# Input model
class ToolInput(BaseModel):
    """Input parameters for your tool"""
    parameter1: str = Field(..., description="Description of parameter1")
    parameter2: float = Field(..., ge=0, le=1, description="Must be between 0 and 1")
    parameter3: Optional[int] = Field(None, description="Optional parameter")

    class Config:
        json_schema_extra = {
            "example": {
                "parameter1": "example value",
                "parameter2": 0.5,
                "parameter3": 100
            }
        }

# Output models
class ResultStatus(str, Enum):
    """Enum for result status"""
    SUCCESS = "SUCCESS"
    WARNING = "WARNING"
    ERROR = "ERROR"

class ToolOutput(BaseModel):
    """Output structure for your tool"""
    status: ResultStatus
    message: str
    data: Dict[str, Any]
    recommendations: List[str]
Test Locally
Run your application:
uvicorn app:app --reloadTest the health check:
curl http://localhost:8000/health
# Should return: {"status":"healthy","version":"1.0.0"}
Visit the auto-generated docs:
Open browser to:
http://localhost:8000/docsFastAPI creates interactive API documentation automatically
Step 4: The Discovery Endpoint
This is where most integration issues happen. The discovery endpoint must match Opal's exact format.
The Critical Format
⚠️ IMPORTANT: Opal expects a very specific JSON structure. Get this wrong and your tool won't be discovered.
Correct Format:
@app.get("/discovery")
async def discovery() -> Dict[str, Any]:
    """
    Opal tool discovery endpoint.
    Returns tool manifest in Opal's expected format.
    """
    logger.info("Discovery endpoint requested")

    return {
        "functions": [  # Must be "functions", not "tools"
            {
                "name": "my_tool_name",  # Unique identifier (lowercase, underscores)
                "description": "Clear description of what the tool does and when to use it",
                "parameters": [
                    {
                        "name": "param_name",
                        "type": "string",  # string, number, integer, boolean, array, object
                        "description": "What this parameter represents",
                        "required": True  # or False
                    },
                    {
                        "name": "optional_param",
                        "type": "number",
                        "description": "Optional parameter example",
                        "required": False
                    }
                ],
                "endpoint": "/execute",  # Relative path to execution endpoint
                "http_method": "POST",  # Must be "POST" for most tools
                "auth_requirements": []  # Empty array for no auth
            }
        ]
    }
Common Mistakes to Avoid
❌ Wrong: "tools": [...] → ✅ Correct: "functions": [...]
❌ Wrong: "method": "POST" → ✅ Correct: "http_method": "POST"
❌ Wrong: Nested validation objects → ✅ Correct: Flat parameter structure
❌ Wrong: Full URL in endpoint → ✅ Correct: Relative path

Description Best Practices
Good Description:
"description": "Analyzes A/B test proposals for statistical validity, hypothesis quality, and design best practices. Use this when a user wants to evaluate if their experiment is ready to launch."Why It's Good:
Explains WHAT the tool does
Explains WHEN to use it
Clear and specific
Helps LLM decide when to invoke
Bad Description:
"description": "A tool for tests"Why It's Bad:
Too vague
No context on when to use
LLM won't know when it's appropriate
Testing Your Discovery Endpoint
# Local test
curl http://localhost:8000/discovery

# Check the format
curl http://localhost:8000/discovery | python -m json.tool

# Compare to a working Opal tool
curl https://analytics.optimizely.com/opal-tools/discovery | python -m json.tool
Step 5: The Execution Endpoint
The execution endpoint does the actual work. Here's where you'll spend most of your development time.
Understanding Opal's Request Format
Critical Discovery: Opal wraps your parameters in a specific format:
{
  "parameters": {
    "your_param1": "value1",
    "your_param2": 123
  },
  "environment": {
    "execution_mode": "interactive"
  },
  "chat_metadata": {
    "thread_id": "uuid-string"
  }
}
Key Insight: You must extract body["parameters"] - not just use the body directly!
Execution Endpoint Template
@app.post("/execute")
async def execute_tool(request: Request) -> Dict[str, Any]:
    """
    Main execution endpoint for the tool.
    Receives parameters from Opal and returns results.
    """
    try:
        # 1. Get raw request body
        body = await request.json()
        logger.info(f"Received request: {body}")

        # 2. Extract parameters (CRITICAL STEP!)
        parameters = body.get("parameters", {})

        # 3. Validate parameters with Pydantic
        validated_input = ToolInput(**parameters)
        logger.info(f"Validated input: {validated_input}")

        # 4. Perform your tool's core logic
        result = perform_analysis(validated_input)

        # 5. Return structured output
        return result.model_dump()  # Or result.dict() in Pydantic v1

    except Exception as e:
        logger.error(f"Execution failed: {str(e)}")
        raise HTTPException(
            status_code=500,
            detail=f"Tool execution failed: {str(e)}"
        )
Core Logic Implementation
This is where your domain expertise lives. Example structure:
def perform_analysis(input_data: ToolInput) -> ToolOutput:
    """
    Core business logic of your tool.
    """
    # Step 1: Validate business rules
    if input_data.parameter2 < 0.01:
        return ToolOutput(
            status=ResultStatus.ERROR,
            message="Parameter2 must be at least 0.01",
            data={},
            recommendations=["Increase parameter2 to at least 0.01"]
        )

    # Step 2: Perform calculations
    result_value = complex_calculation(
        input_data.parameter1,
        input_data.parameter2
    )

    # Step 3: Generate insights
    insights = generate_insights(result_value)

    # Step 4: Create recommendations
    recommendations = create_recommendations(insights)

    # Step 5: Return structured output
    return ToolOutput(
        status=ResultStatus.SUCCESS,
        message="Analysis complete",
        data={
            "result": result_value,
            "insights": insights
        },
        recommendations=recommendations
    )
Error Handling Strategy
# Use specific error types
class InsufficientDataError(Exception):
    """Raised when input data is insufficient"""
    pass

class ValidationFailedError(Exception):
    """Raised when business validation fails"""
    pass

# Handle errors appropriately
try:
    result = perform_analysis(input_data)
except InsufficientDataError as e:
    return ToolOutput(
        status=ResultStatus.ERROR,
        message=f"Insufficient data: {str(e)}",
        data={},
        recommendations=["Provide more complete data"]
    )
except ValidationFailedError as e:
    return ToolOutput(
        status=ResultStatus.WARNING,
        message=f"Validation warning: {str(e)}",
        data={},
        recommendations=["Review input parameters"]
    )
Testing Your Execution Endpoint
# Test with curl
curl -X POST http://localhost:8000/execute \
  -H "Content-Type: application/json" \
  -d '{
    "parameters": {
      "parameter1": "test value",
      "parameter2": 0.5,
      "parameter3": 100
    }
  }'
Debugging Tips
Add comprehensive logging:
import json

@app.post("/execute")
async def execute_tool(request: Request):
    try:
        # Log the raw request
        body = await request.json()
        logger.info(f"Raw request body: {json.dumps(body, indent=2)}")

        # Log extracted parameters
        parameters = body.get("parameters", {})
        logger.info(f"Extracted parameters: {json.dumps(parameters, indent=2)}")

        # Log validation result
        validated_input = ToolInput(**parameters)
        logger.info(f"Validation successful: {validated_input}")

        # ... rest of logic

    except Exception as e:
        # Log the full error with traceback
        logger.exception("Execution failed")
        raise
Step 6: Deploying to Production
Your tool needs a public URL for Opal to access it. We'll use Railway, but the principles apply to any platform.
Why Railway?
✅ Free tier sufficient for POC
✅ Automatic HTTPS/SSL
✅ GitHub integration (auto-deploy on push)
✅ Simple environment variable management
✅ Built-in logging and monitoring
Alternatives: Render, Heroku, Google Cloud Run, AWS Lambda, Azure Functions
Prepare for Deployment
1. Create Procfile (optional, Railway auto-detects): web: uvicorn app:app --host 0.0.0.0 --port $PORT
2. Verify requirements.txt is complete
3. Create README.md with deployment instructions
Deploy to Railway
Step 1: Create Railway Account
Visit https://railway.app
Sign up with GitHub
Free tier: $5/month credit (enough for small tools)
Step 2: Create New Project
Click "New Project"
Select "Deploy from GitHub repo"
Authorize Railway to access your repository
Select your tool repository
Step 3: Configure Project
Railway auto-detects Python/FastAPI
Click "Deploy"
Wait 2-3 minutes for build
Step 4: Get Your URL
Click on your deployment
Find the public URL:
https://your-app.up.railway.appTest the health endpoint
Step 5: Test Discovery Endpoint
curl https://your-app.up.railway.app/health
curl https://your-app.up.railway.app/discovery
Continuous Deployment
Railway automatically redeploys when you push to GitHub:
# Make changes locally
git add .
git commit -m "Update analysis logic"
git push origin main

# Railway detects push and redeploys (2-3 minutes)
Environment Variables
For configuration or secrets:
Railway Dashboard → Your Project → Variables
Add variables (e.g.,
API_KEY,DATABASE_URL)Access in code:
import os

API_KEY = os.getenv("API_KEY")
DATABASE_URL = os.getenv("DATABASE_URL")
Monitoring and Logs
View Logs:
Railway Dashboard → Deployments → View Logs
See real-time stdout/stderr
Filter by time range
What to Log:
logger.info("Discovery endpoint requested")  # Track usage
logger.info(f"Processing request for user")  # Track activity
logger.error(f"Analysis failed: {error}")    # Track errors
Step 7: Registering Your Tool in Opal
Now that your tool is deployed, tell Opal about it.
Access Tool Registry
Log into Optimizely Opal
Navigate to Tools (wrench icon in sidebar)
Click "Registries" tab
Click "Add tool registry"
Register Your Tool
Registry Name: My Custom Tool
Discovery URL: https://your-app.up.railway.app/discovery
Bearer Token (optional):
Leave blank if no authentication
If you add auth later, update here
Click "Save"
What Happens Next
Opal calls your
/discoveryendpointReceives and validates the tool manifest
Caches the manifest
Makes your tool available to agents
Verify Registration
After saving, you should see:
✅ Your registry name in the list
✅ Discovery URL displayed
✅ Last sync timestamp
✅ Tool count (e.g., "1 tool discovered")
✅ Tool names listed (your function names)
Troubleshooting Registration
Error: "Discovery URL does not return valid functions data"
Causes:
Wrong JSON format (check "functions" vs "tools")
Missing required fields
Invalid HTTP response
Solution:
# Test your discovery endpoint format
curl https://your-app.up.railway.app/discovery | python -m json.tool

# Compare to working example
curl https://analytics.optimizely.com/opal-tools/discovery | python -m json.tool
Error: "Unable to reach discovery endpoint"
Causes:
URL is wrong
Service is down
HTTPS/SSL issue
Solution:
# Verify URL is accessible
curl -I https://your-app.up.railway.app/discovery

# Check Railway deployment status
# Verify health endpoint works first
curl https://your-app.up.railway.app/health
Syncing Updates
When you update your tool:
Deploy new version (Railway auto-deploys on push)
Wait for deployment to complete
In Opal: Tools → Registries → Your Tool → Actions (⋮) → Sync
Opal re-fetches your discovery endpoint
Updated manifest is now cached
Important: Always sync after deploying changes!
Step 8: Creating a Specialized Agent
Agents make your tool conversational. Let's create one.
Navigate to Agents
Opal sidebar → Agents (sparkle icon)
Click "New Specialized Agent"
Configure Agent Details
Name: My Tool Expert
ID (auto-generated from name): my_tool_expert
Description: Expert assistant that helps users analyze [your domain] using advanced [your tool name] capabilities. Provides clear, actionable insights and recommendations.
Status: Toggle to Active
Write the Agent Prompt
This is crucial - it defines how your agent behaves:
You are an expert in [your domain] with deep knowledge of [your expertise area].

A user needs help [what your tool does]. Your role is to:

1. Gather the following information through natural, friendly conversation:
   - [Parameter 1]: [What it means and why you need it]
   - [Parameter 2]: [What it means and why you need it]
   - [Parameter 3]: [What it means and why you need it]
   [List all required parameters]

2. Once you have all required information, use the [your_tool_name] tool
   to perform the analysis.

3. Present the results in a clear, actionable format:
   - Lead with the main conclusion
   - Explain key findings
   - Highlight any warnings or concerns
   - Provide specific, prioritized recommendations
   - Offer to dive deeper into any area

Be professional but friendly. Use clear language without jargon.
If results are concerning, be honest but constructive. Always focus
on actionable next steps.

Important: Never make up data. Only use results from the tool.
Prompt Best Practices:
✅ Clear role definition: "You are an expert in..."
✅ Specific instructions: "Gather these parameters..."
✅ Tool usage guidance: "Use the [tool_name] tool when..."
✅ Response format: "Present results like this..."
✅ Tone guidance: "Be professional but friendly"
❌ Avoid vagueness: "Help the user"
❌ Don't over-constrain: Let the LLM be natural
❌ Don't forget edge cases: What if tool returns errors?
Link Your Tool
In the Input section:
Find "Tools" dropdown or "Add Tool" button
Search for your tool name
Select it
Verify it appears in the linked tools list
Why This Matters: Without linking, the agent can't use your tool!
Configure Output Settings
Data Type: Text
Description: Comprehensive analysis with findings, insights, and actionable recommendations
Inference Level: Standard (default)
Creativity: 0.5 (default)
Lower (0.1-0.4): More deterministic, factual
Higher (0.6-0.9): More creative, varied responses
For analytical tools, stick with 0.5 or lower
Save Your Agent
Click "Save" at the bottom.
Your agent is now active and ready to use!
Before we test, make sure your specialized tools is enabled for chat Opal -> Tools -> Your Specialized Tool -> Enabled in Chat
Step 9: Testing End-to-End
Time to see everything work together.
Test in Opal Chat
Method 1: Direct Agent Mention
Open Opal Chat
Type:
@my_tool_expert I need help with [your domain]Follow the conversation
Provide parameters when asked
See your tool's results formatted by the agent
Method 2: Natural Conversation
Open Opal Chat
Type:
I need help [doing what your tool does]Opal may route to your agent automatically
Or you can explicitly mention the agent
What to Look For
✅ Agent recognizes request and starts gathering parameters
✅ Parameter collection happens naturally through conversation
✅ Tool is called (you'll see a status like "Analyzing...")
✅ Results are presented in a friendly, formatted way
✅ Recommendations are actionable and specific
Common Issues and Solutions
Issue: Agent doesn't use the tool
Possible causes:
Tool not linked to agent
Agent prompt doesn't mention the tool
Parameters incomplete
Solution:
Verify tool is linked in agent configuration
Update prompt to explicitly mention tool usage
Ensure all required parameters are gathered
Issue: "Unexpected error" when tool is called
Possible causes:
Tool returned 422 (validation error)
Tool returned 500 (internal error)
Wrong parameter format
Solution:
# Check Railway logs immediately after error
# Look for the request body and error message
Issue: Tool returns results but agent doesn't show them
Possible causes:
Tool response format unexpected
Agent prompt doesn't know how to present results
Solution:
Verify tool returns valid JSON
Update agent prompt with specific formatting instructions
Debugging with Railway Logs
During your test in Opal:
Open Railway Dashboard
Go to Logs
Watch in real-time as request comes in
Look for:
"Raw request body received: ..."
Any error messages
The response being sent back
Example healthy log sequence:
INFO: Discovery endpoint requested
INFO: Raw request body received: {"parameters": {...}}
INFO: Validated input: ToolInput(...)
INFO: Analysis complete
Example error log sequence:
INFO: Raw request body received: {"parameters": {...}}
ERROR: Analysis failed: 5 validation errors for ToolInput
hypothesis
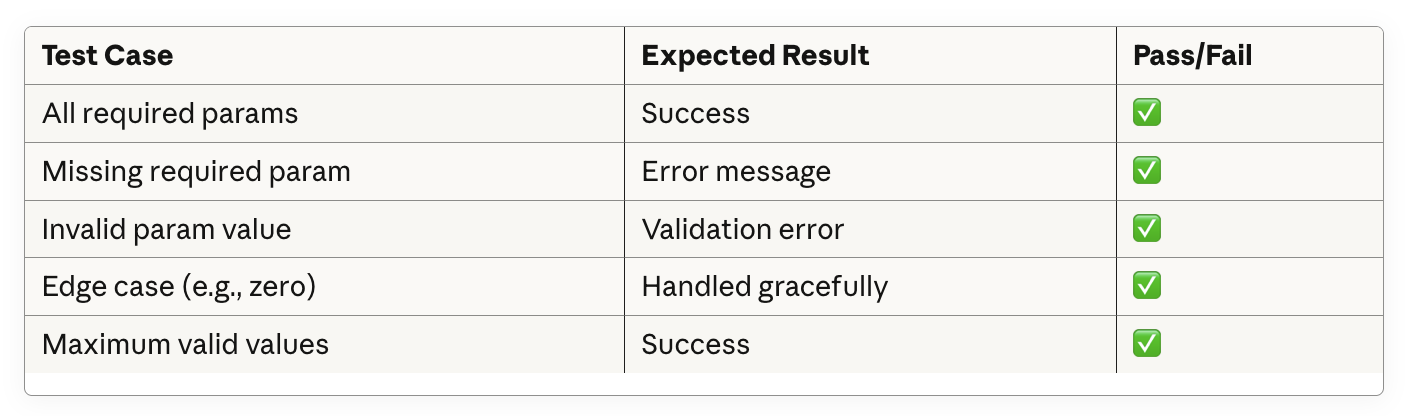
Field required [type=missing, input_value={'minimum_...}]Test with Different Scenarios
Create a test matrix:
Troubleshooting Guide
Discovery Issues
Symptom: "Discovery URL does not return valid functions data"
Diagnosis Checklist:
# 1. Can you reach the endpoint?
curl https://your-app.up.railway.app/discovery

# 2. Is it valid JSON?
curl https://your-app.up.railway.app/discovery | python -m json.tool

# 3. Does it match Opal's format?
# Check: "functions" not "tools"
# Check: "http_method" not "method"
# Check: Required fields present (name, description, parameters, endpoint)
Common Fixes:
Change
"tools"to"functions"Change
"method"to"http_method"Remove nested validation objects
Use relative paths in endpoint field
Agent Issues
Symptom: Agent doesn't use the tool
Diagnosis:
Is tool linked in agent configuration?
Does agent prompt mention the tool?
Are all parameters gathered before attempting to call?
Fix: Update agent prompt: Once you have gathered [param1], [param2], and [param3], use the [tool_name] tool by calling it with these parameters.
Deployment Issues
Symptom: Railway build fails
Common Causes:
requirements.txtmissing dependenciesPython version incompatibility
Port configuration wrong
Fix:
# Test build locally first
pip install -r requirements.txt
uvicorn app:app --host 0.0.0.0 --port 8000

# Verify requirements.txt has all imports
pip freeze > requirements.txt
Performance Issues
Symptom: Tool times out
Diagnosis:
Check Railway logs for long-running operations
Monitor response times in logs
Optimizations:
# Add timeout handling
import asyncio

async def execute_tool(request: Request):
    try:
        # Timeout after 25 seconds (Railway limit is 30s)
        result = await asyncio.wait_for(
            perform_analysis(input_data),
            timeout=25.0
        )
    except asyncio.TimeoutError:
        return {"error": "Analysis timed out. Try with smaller dataset."}
Best Practices
Code Quality
1. Use Type Hints
def analyze_data(input_value: float, threshold: int) -> Dict[str, Any]:
    """Clear types help prevent bugs"""
    pass
2. Validate Everything
class ToolInput(BaseModel):
    value: float = Field(..., ge=0, le=1, description="Must be 0-1")

    @validator('value')
    def validate_value(cls, v):
        if v == 0:
            raise ValueError("Value cannot be exactly 0")
        return v
3. Handle Errors Gracefully
try:
    result = risky_operation()
except SpecificError as e:
    return {
        "status": "ERROR",
        "message": f"Friendly error message: {str(e)}",
        "recommendations": ["How to fix it"]
    }
API Design
1. Make Discovery URL Stable
Don't change
"name"field once deployedChanging name breaks existing agent configurations
Version your tool instead:
my_tool_v2
2. Keep Parameters Focused
Require only essential parameters
Make advanced options optional
Provide sensible defaults
3. Return Structured Data
# Good: Structured, parseable
{
    "status": "SUCCESS",
    "metrics": {"score": 7.5, "confidence": 0.85},
    "recommendations": ["Action 1", "Action 2"]
}

# Bad: Unstructured text blob
{
    "result": "The analysis shows a score of 7.5 with 85% confidence. You should do Action 1 and Action 2."
}
Agent Prompt Engineering
1. Be Specific About When to Use Tool
Use the tool when:
- User has provided all required parameters
- User asks for analysis or validation
- User wants recommendations
Do NOT use the tool when:
- Just answering questions about the tool
- Explaining concepts
- User hasn't provided necessary information
2. Guide Response Formatting
Present results like this:
Lead with the overall conclusion (1 sentence)
Key Findings:
Most important finding
Secondary findings
Recommendations:
Highest priority action
Supporting actions
Offer to explain any section in detail
3. Handle Edge Cases
If the tool returns an error: - Explain what went wrong in simple terms - Suggest how to fix it - Offer to help gather correct information
Conclusion
You've learned how to:
✅ Design effective custom Opal tools
✅ Build FastAPI-based tool services
✅ Create proper discovery and execution endpoints
✅ Deploy to production with continuous deployment
✅ Register tools in Opal's tool registry
✅ Create specialized agents that use your tools
✅ Debug integration issues systematically
✅ Follow production-ready best practices
The opportunity ahead: As one of the first to build custom Opal tools, you're at the forefront of a new way of working. The tools you build today will shape how teams work with AI tomorrow.
Remember: Start simple, test thoroughly, iterate based on feedback, and always focus on solving real problems for real users.
Now go build something amazing!
Appendix: Quick Reference
Essential URLs
Railway: https://railway.app
Optimizely Docs: https://docs.developers.optimizely.com/content-management-system/docs/optimizely-opal
FastAPI Docs: https://fastapi.tiangolo.com
Pydantic Docs: https://docs.pydantic.dev
Useful Commands
# Local development
python3 -m venv venv
source venv/bin/activate
pip install -r requirements.txt
uvicorn app:app --reload

# Testing
curl http://localhost:8000/health
curl http://localhost:8000/discovery
curl -X POST http://localhost:8000/execute -H "Content-Type: application/json" -d '{...}'

# Deployment
git add .
git commit -m "Update"
git push origin main

# Debugging
# Check Railway logs after each test
# Look for: "Raw request body received"
Discovery Endpoint Checklist
✅ Returns "functions" array (not "tools")
✅ Uses "http_method" field (not "method")
✅ Has clear "description" explaining when to use
✅ All parameters have "name", "type", "description", "required"
✅ Endpoint is relative path (e.g., "/execute")
✅ Returns valid JSON
Execution Endpoint Checklist
✅ Extracts body["parameters"] not just body
✅ Validates with Pydantic models
✅ Has comprehensive error handling
✅ Returns structured JSON
✅ Logs requests for debugging
✅ Handles edge cases gracefully
Agent Configuration Checklist
✅ Clear, specific prompt with tool usage instructions
✅ Tool is linked in the Input section
✅ Parameter gathering strategy defined
✅ Response formatting guidance included
✅ Error handling instructions present
✅ Agent status set to Active
This guide was created based on real-world experience building production Opal tools. All code examples are tested and production-ready. Special thanks to the Optimizley partnership team for enabling us to be pioneers in custom Opal tool development.
Connect with 33 Sticks
Want to discuss your Opal tool ideas or need expert guidance?
33 Sticks specializes in:
Custom Opal tool development
AI agent design and optimization
Optimizely platform integration
Digital experience optimization
Contact Us:
Website: 33sticks.com
Email: info@33sticks.com